You can pay in financial items in Finances menu, available from the drop-down menu from the Finance menu, or in the To be paid menu from the main Finances main menu.
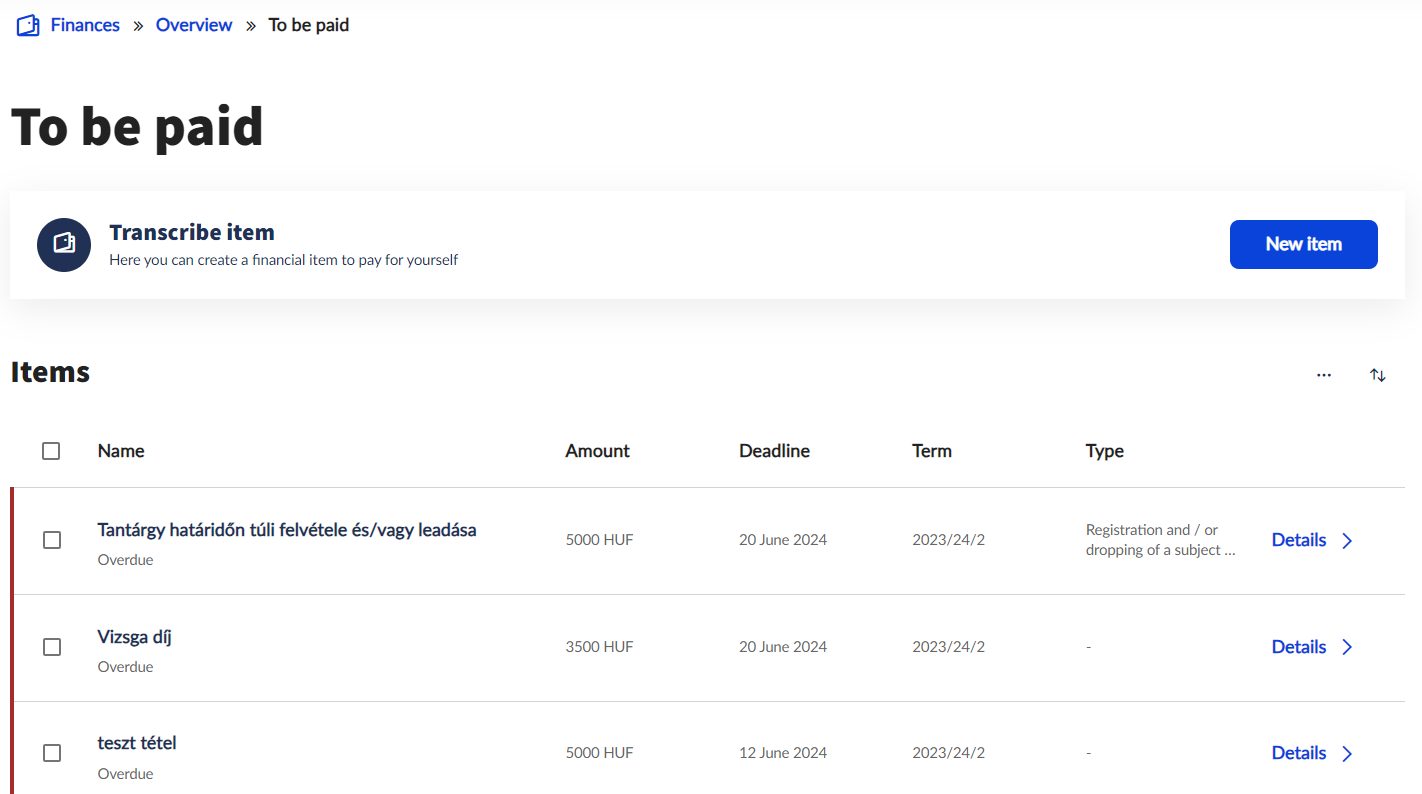
In the To be paid menu, students can view and pay their outstanding debts to the institution, mark them as student loans, submit requests or delete items they have transcribed.
Colors at the beginning of the rows indicate the status of each item to be paid: red if the payment deadline has expired; orange if the payment deadline is within 2 weeks; blue if there is a paying partner or organisation assigned to the item or a student loan is in the process of being settled.
Click on the name of the item or use the Details button at the end of the item line to view the details of the item to be paid. Once the interface is opened, you will see the details of the application and the functions related to the item to be paid (Print, Signing up with a student loan, Submit request, Assigning a paying partner).
If the student has an item to be paid, they can settle it in several ways.
You can select items as a group in the To be paid menu, or you can initiate a payment for a single item. You can select the item or items to be paid by ticking the checkbox at the beginning of the line. When selected, a menu bar will appear at the bottom of the page to highlight the possible functions that can be applied to the item. Here you will need to click on the Payment button.

The payment can also be initiated from the details of the item. In this case, it is only possible to pay for one item at a time. Click on the item name or use the Details button at the end of the item line to access the details of the item to be paid. Once the interface is opened, the payment can be initiated by clicking on the Payment type selection button.
You can also start the payment of items right after you transcribe them.
Once the payment has been started, it is necessary to select the payment method. You can pay for the items by a simple online payment or by using a collective account (only in HUF!).
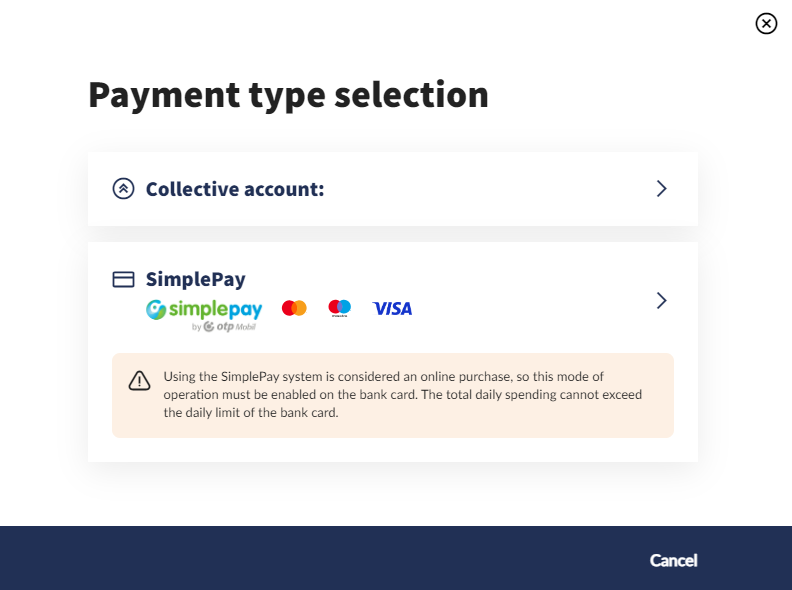
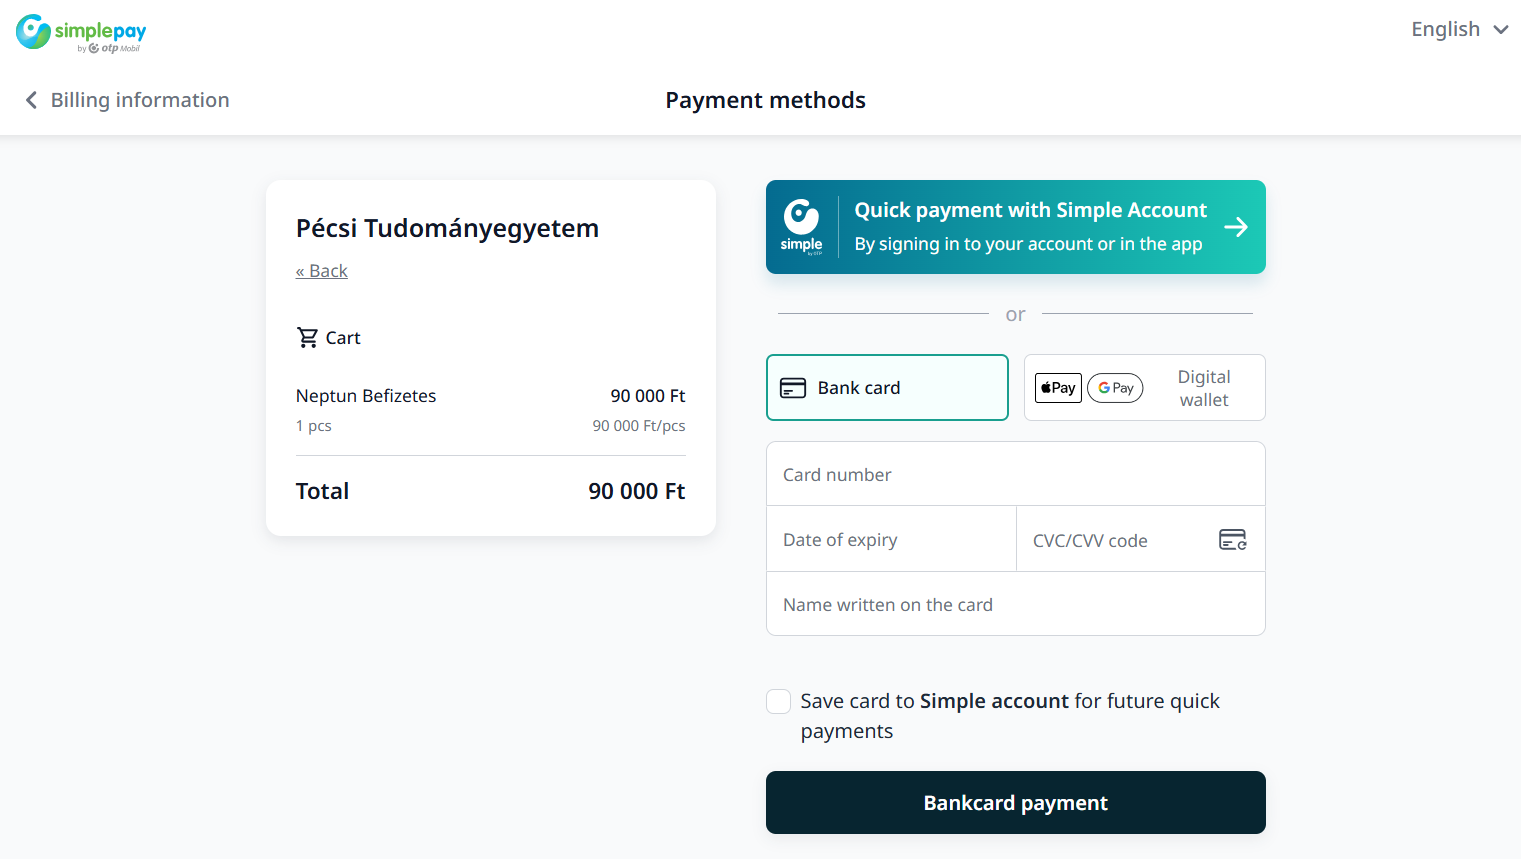
Online payment (Simple Pay)
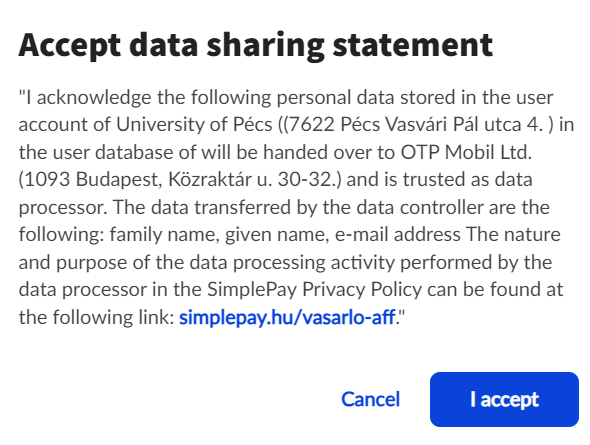
If you pay by debit or credit card, you can make the payment via the OTP Bank Simple Pay website using a suitable card. When using the Simple Pay payment method, the system will always ask you to accept the Data sharing statement. Without acceptance, the payment cannot be processed.
You will then be taken to the Simple Pay website, where you can complete your payment online by entering your debit/credit card details. If the payer is already a registered Simple Pay user, has a mobile app, they can also pay using the credit card details recorded in Simple by logging in with Facebook, Google or the registered email address. After logging in, the payment can be started with the already registered or newly added card. As with a collective account payment, the registration of the completion of the payment by card is done immediately in Neptun. A confirmation window informs you of the successful payment.
Payment via collective account
The collective account can be filled up beforehand with a chosen amount – but only in HUF. Therefore, items that are transcribed in a different currency (EUR or USD) cannot be paid via collective accounts.
If the student has previously filled up their collective account with sufficient funds and the item to be paid is transcribed in HUF, choosing the Collective account payment method will automatically take money out of the collective account to use for the payment of the item. The registration of the completion of the payment is done immediately in Neptun.
Signing up with a Student Loan
Student Loan (Diákhitel) is the student loan available mostly to Hungarian citizens. If you are paying your tuition fee with Student Loan, the items need to be marked as such.
The first step is to record the Student Loan2 contract number in the Finances / Data and settings / Student Loan2 menu.
Once the contract number has been successfully recorded, the Student Loan2 contract number can be recorded for the item or items from two directions in the Finances / To be paid menu.
From the To be paid menu, select the item or items to record the contract number by pressing the Signing up with a student loan button in the action bar at the bottom of the screen. Only from this direction is it possible to mark the contract number for more than one item at a time. If the student accidentally selects an item for which Student Loan2 cannot be used, an information message will be displayed and the Continue button will not appear.
After successfully marking the items with Student Loan, the status of the item will be displayed as “Student Loan Settlement in progress”, and the item will also be marked in blue.
It is also possible to mark the item with a Student Loan from the Details of the item to be paid, also using the Signing up with a student loan button. Here, you can only mark one item at a time and only the item that you are in the details of.
The Checking status means that the application is in progress. In the background, the institution will then forward the student's education details to the Student Loan Centre, who will be able to decide whether the student is eligible to apply, based on their studies and other circumstances. At the end of the process, the Student Loan2 status will be changed to either Accepted or Rejected. The Accepted status entails the Completed status of the item after the Student Loan Centre transferred the amount to the institute. If the student loan is rejected, the student has to pay the debt via another payment method.