From the drop-down menu or from the Exams main menu, you can access the Overview, Take exam, Taken exams, Remaining exams, Results and Final exams menus.
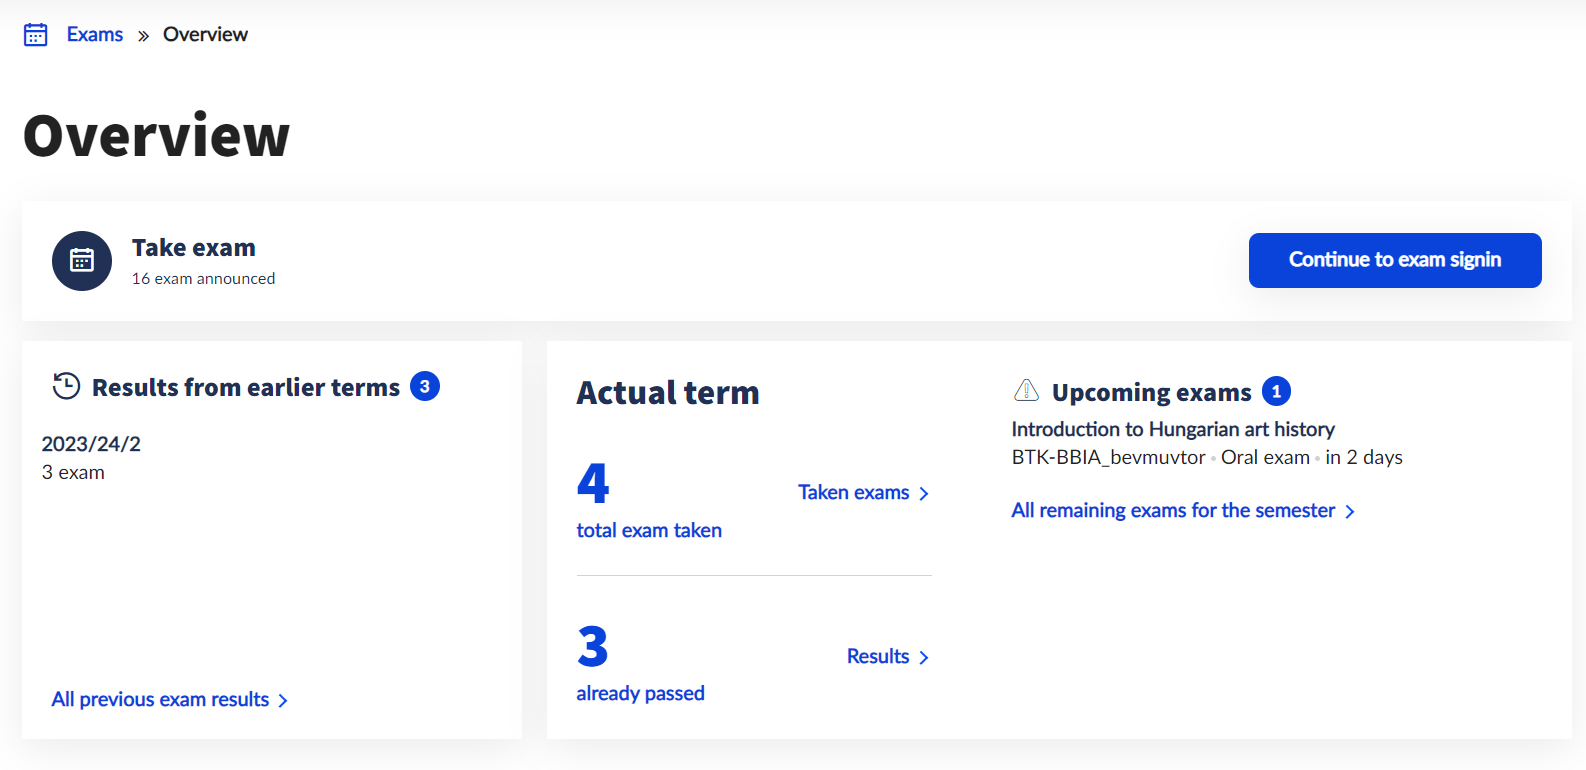
The Overview menu consists of three parts.
The Take exam card shows the number of announced exams currently available for the semester from the courses you have taken. The Continue to exam signin button navigates directly to the Take exam menu.
The Results from earlier terms card shows the recorded exam grades by semester. Clicking on a semester or on the All previous exam results button will navigate to the Results menu.
The Actual term card shows the number of taken exams remaining in the semester, the number of exams already passed, and next to them the details of the three closest exams remaining. The Taken exams button navigates to the Taken exams menu, the Results button navigates to the Results menu, and the All remaining exams for the semester button navigates to the Remaining exams menu.
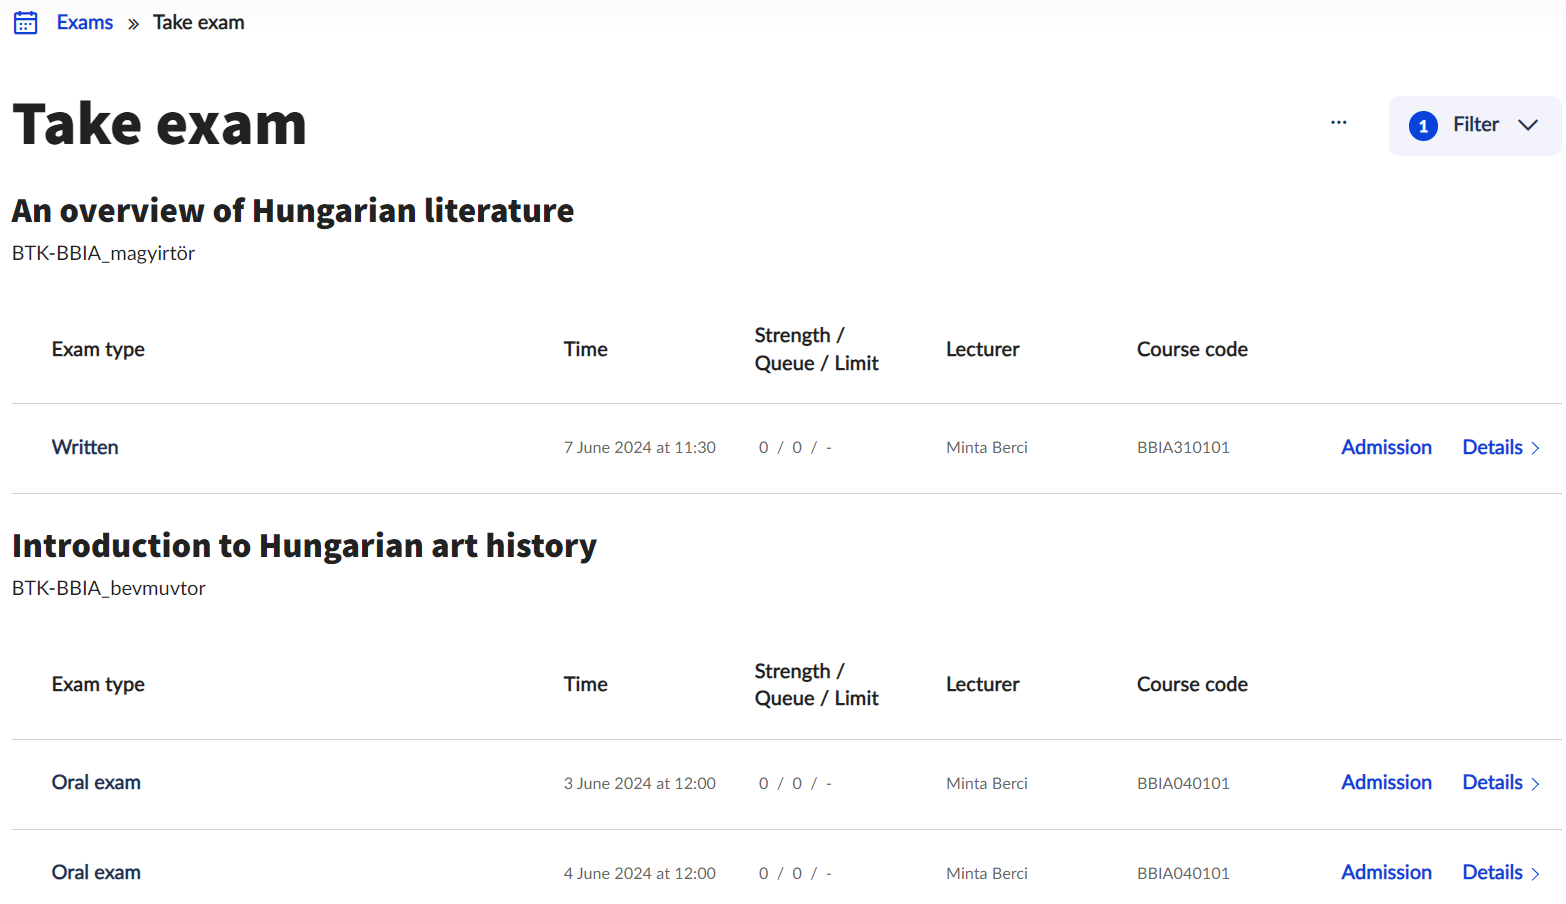
When you enter the Take exam interface, all the exams announced for the current semester after the current date are displayed, grouped by subject.
The Filter drop-down menu in the top right corner allows you to filter exam dates by term, subject, exam type, exam registration and lecturer. If you suspect that not all exams are displayed, it is worth checking whether there are any filters set from a previous search. Click on the Filter list button to apply the specified filter criteria. Click on the Delete filter button to clear all filter criteria at once and display the complete list.
Click on the ... button next to the Filter button to access the Edit columns function, which allows you to rearrange the order of the displayed columns. Displayed columns can be:
the exam type,
the time of the exam,
the headcount of the exam (number of students who have taken the exam/number of students on the waiting list/limit of registered students),
the lecturers (examiners),
the course code,
the exam registration
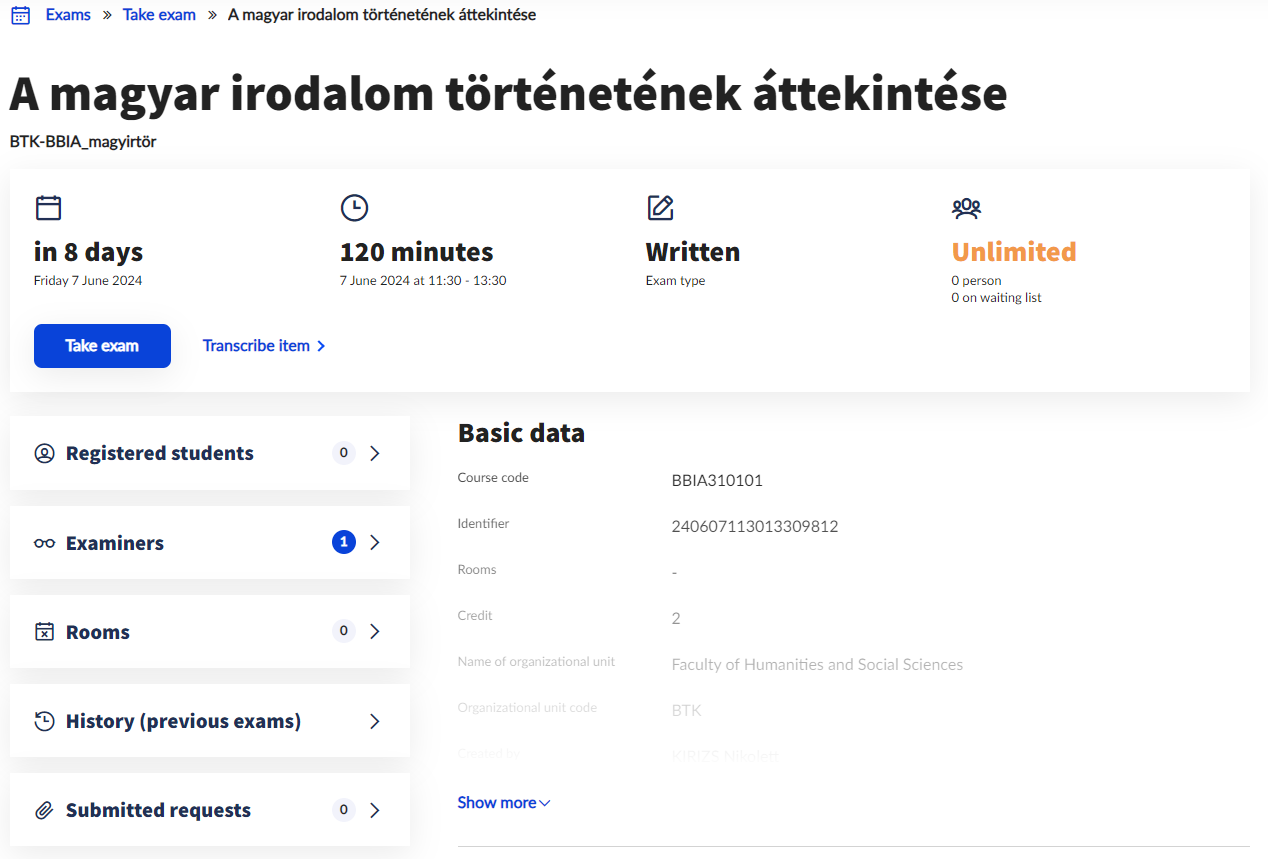
You can take the exam immediately by clicking on the Take button next to the given exam date. It is only possible to register for (and drop) an exam during the exam registration period, according to the faculty’s academic calendar and registration conditions.
In all cases, a push notification will be sent to confirm the success of the registration. If any of the conditions of the application are not met, the reason will also be indicated in the push notification. The new student interface uses a different logic than the old student web, so it is important to note that the application is only completed when the push notification is received!
The Details button navigates to the details of the exam. Next to the basic data of the exam, you can see the list of registered students and examiners, the rooms assigned to the exam, previous exams and any requests submitted for the exam (if any).
Exam dates that the user has already been registered for are highlighted in green and the Drop button will be available instead of the Take button. The Exchange and Drop buttons are available on the Details screen of an exam that has already been taken. The Exchange function allows you to take a different exam date for the same course at the same time as you drop an exam you have already taken. In case of electronic exams, from the start of the exam, the Starting the exam button will also be available:

In the Taken exams menu, you can view all the past and remaining exams taken per subject. The interface automatically filters the exams for the current semester, this setting can be changed by clicking on the Filter drop-down button.
The Remaining exams menu also displays the exams taken after the current date by subject. The displayed exam data can be filtered by subject, exam type, exam date and instructor (examiner) using the Filter drop-down button.
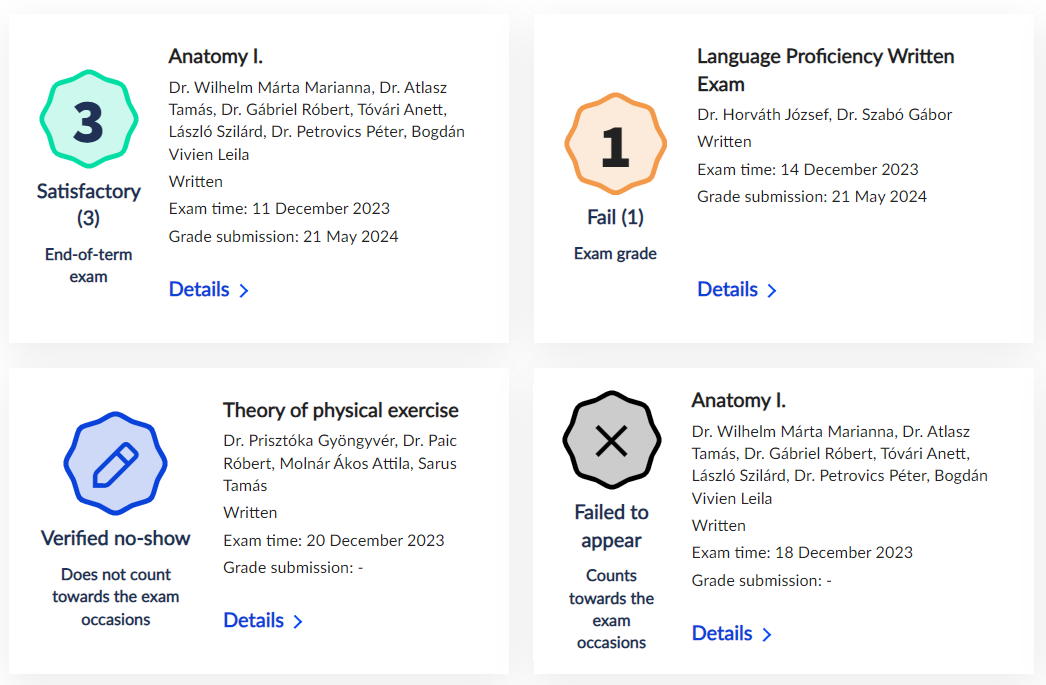
The Results menu displays your exam results by semester. The system marks grades that are better than failing (1) with green, failing grades (1) with red, verified no-shows with blue and uncertified absences with black. Results can be filtered by semester and subject.
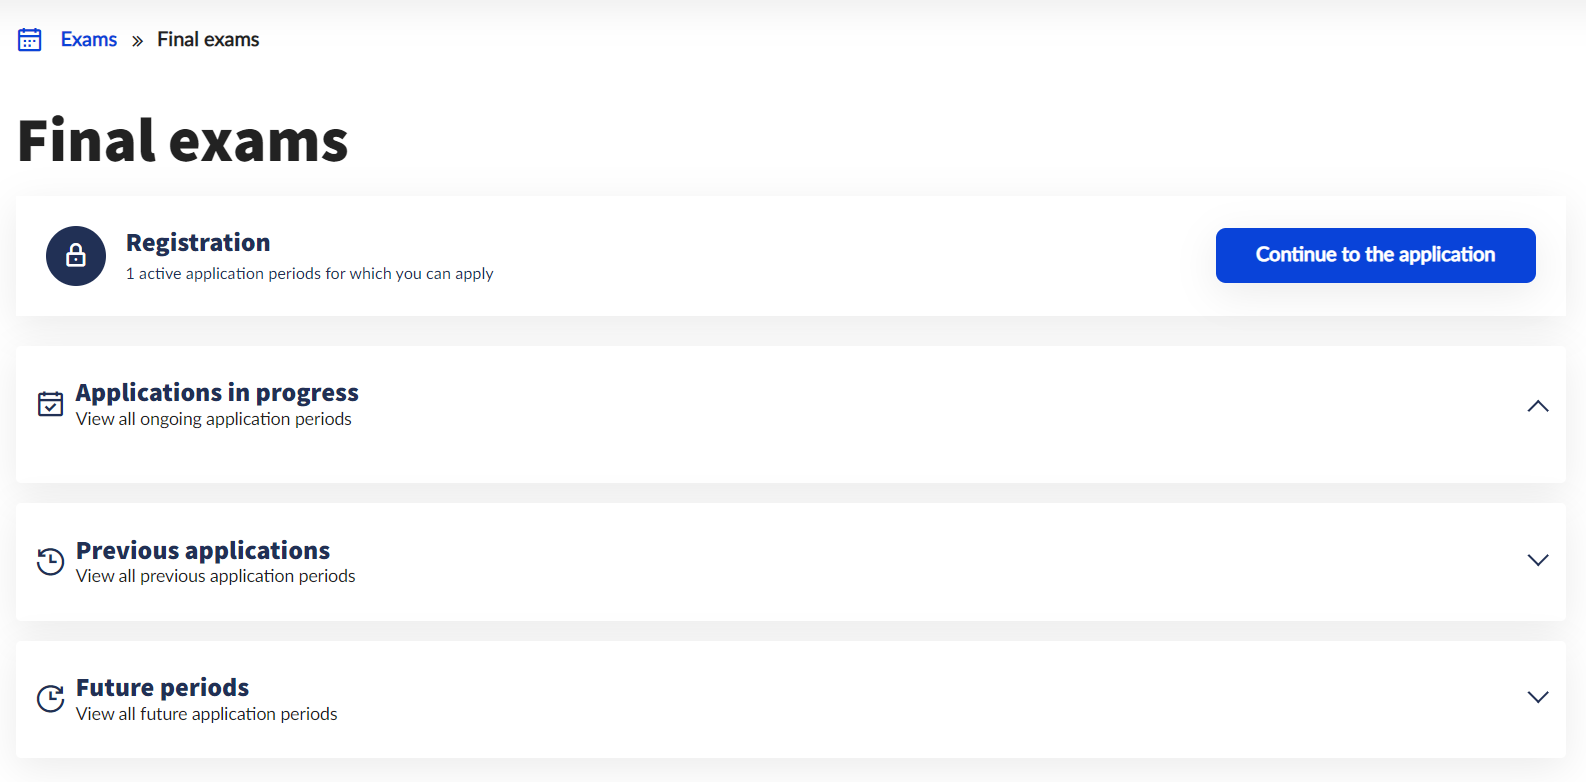
In the Final exams menu, students can register for a final examination during the final examination registration period specified in the faculty’s academic. The interface allows you to view applications in progress, previous applications and future periods already announced. You can start the application for the final exam by clicking on the Continue to the application button. Depending on faculty specifications, if it is necessary to choose a topic when applying, a list of optional topics will be displayed. If you need to fill in a form for the application, the interface will navigate to the form immediately. If you do not need to select topics or fill forms, your application will be submitted automatically just by clicking the Continue to the application button. A push notification will be displayed back to indicate that the application was successful. The Interval data interface displays the details of the scheduled exam.

